Easy DIY Seed Starting Rack: Make a Grow Light Stand Fast
INSIDE: Learn how to set up a seed starting rack in a few hours and grow healthy seedlings under lights. No building required for this easy seed starting shelves DIY.
You want to start plants from seed, and you want it to be easy.
So, you get out some pots, fill them with potting soil, plant your seeds, and water them.
As you place the pots in a sunny window, you look down at them with a satisfied nod.
Even though it seems like an easy way to start seeds – it’s nearly impossible to grow healthy seedlings in front of a window, especially during winter and spring when the days are short, and the sun is weak.
Seedlings need 12-16 hours of strong, overhead light.
And what happens when they don’t get it?
They struggle.
They become spindly, stretched out, and flop over. And that’s a bad thing.
Healthy seedlings are strong, short, and stocky.
They’re much more likely to withstand everything Mother Nature will throw at them.
And growing your seedlings under lights is the best way to make sure they’ll thrive when you set them outside. A proper grow light setup will prevent leggy seedlings.
I’ve been gardening for more than 20 years, and after a lot of trial and error, I have my seed starting system down to a fine art.
And it all starts with the right seed starting setup for seedlings.
Keep reading to discover how easy it is to set up seed starting shelves in your basement, a spare room, or even a cozy corner of your house. This grow light system is adaptable and easy to assemble—no carpentry skills needed!
BONUS: As a bonus for joining my weekly newsletter, download a free set of indoor seed starting setup plans and get your grow light assembled in an afternoon. It’s the best way to grow healthy seedlings this year and every year!
Heads up: I’ll earn a small commission if you buy something after clicking a link in this post. I only link to products I’d recommend to my best friend.

Why you should build an indoor seed starting rack
You may be wondering why go to all the trouble of setting up a seed starting shelf with lights?
Here are five good reasons:
- When you grow indoors, you have total control over the growing environment, which results in happier, healthier seedlings.
- It’s cheaper than a greenhouse.
- You can grow a much wider variety of flowers and vegetables by starting your own seeds indoors.
- You’ll save money by not buying transplants this year.
- You’ll have fewer (or no) leggy seedlings to worry about!
In this guide to creating an indoor seed starting setup, I’ll walk you through the complete list of required (and optional) parts, and give you step-by-step instructions on how to set everything up.
This is a beginner-level DIY project. No handyman skills required!
What you’ll need to set up a seed starting shelf with lights (complete shopping list)
1. Sturdy, adjustable shelves for your DIY grow light stand
I recommend using adjustable wire shelves (with wheels) for your grow light shelves—no flimsy pvc pipe for us!
What I love about these wire shelf units:
- They’re sturdy.
- They’re easy to assemble. They only take about 30 minutes to put together. And the only tool you’ll need is a rubber mallet.
- You can adjust the shelves if you change your mind later.
- They’re easy to move because they have wheels.
- You can fit up to four 10″ x 20″ seedling trays on each shelf!
- When you’re not starting seeds on them, you can use them for storage or as a drying rack for herbs or a curing rack for garlic and onions.
The first thing to decide is how deep of a shelf unit to purchase.
You have two choices, 1.5′ deep, or 2′ deep.
If you have the floor space and budget for the 2′ deep shelves and lights, they’re the better investment because you’ll get more light coverage on your seedlings.
Wire shelf unit: 1.5′ x 4′ x 6′
- Pros: Less expensive and has a small footprint.
- Cons: Because the lights that fit this shelf don’t fully cover a 10″ x 20″ tray, the seedlings on the ends of the flat can get a little leggy.
- Plan to spin your seed trays regularly, so they get more evenly lit.
- This setup also works best when you can place the shelves next to a wall that you’ve covered with mylar – this helps to bounce more light back onto the seedlings. If you can’t put your stand next to a wall, choose the 2′ x 4′ shelves.
- The other thing you can do is put only two trays on each shelf, end-to-end, but this cuts the number of seedlings you can grow in half!
Wire shelf unit: 2′ x 4′ x 6′
- Pros: Even light for your seedlings. The 6-tube lights you’ll use with this setup give excellent light coverage for 10 x 20″ trays.
- Cons: The shelves take up more floor space, and the shelves and lights are more expensive.
Shop for supplies: Shelf unit
Prices last updated on 2025-07-09 at 23:01
2. The best seed starting grow lights
Once you’ve chosen your shelf unit, the next thing to do is choose your indoor grow lights.
I recommend fluorescent grow lights from Hydrofarm. They’re reliable, relatively inexpensive, and use fluorescent bulbs.
I’ve used them for years and have always been happy with them. They’re my favorite grow light for starting seeds indoors.
And they have a “designer” series, which has a bronze finish if you don’t like the look of the white fixtures.
LED grow lights are another option, but be aware that you generally need to keep LED lights very far away from the tops of your plants (20 inches or more), which means your grow light setup will take up a lot more floor space and may require multiple shelving units.
If you choose to use a shop light, make sure to choose a full-spectrum fluorescent bulb that puts out enough lumens for your indoor plants.
Here’s how to make it easy to grow healthy seedlings every year: download my FREE grow light plans.
The size of fluorescent light you choose depends on the shelving unit you’re using.
- The 4-bulb fixtures fit the 1.5′ x 4′ shelves.
- The 6-bulb fixtures fit the 2′ x 4′ shelves.
- But if you hang one light from the ceiling, and use the top shelf for growing plants, you can use one 6-bulb fixture with the 1.5′ x 4′ shelf unit.
Another option is to use two 2′ x 2′ fixtures on one shelf. This gives you more flexibility.
- You can start 2 flats under one light, and not have to turn an entire 4′ fixture on.
- Or start flats at very different times and raise and lower the heights of the two lights independently.
Shop for supplies. Best grow lights: 4-bulb lights (fit the 1.5′ x 4′ shelves)
- Dimensions (L x W x H): 46.2 x 12.8 x 2.8 inches
- Includes 10' grounded power cord
- 3"H x 13.5"W x 23"L
- Includes 8' grounded power cord
- 2 3/8”H x 13"W x 46.25"L
- Includes 10' grounded power cord
- 2 3/8”H x 13"W x 23.25"L
- Includes 10' grounded power cord
Prices last updated on 2025-07-09 at 23:24
Shop for supplies. Best grow lights: 6-bulb lights (fit the 2′ x 4′ shelves)
- Dual On/Off switches allow you to control the amount of lumens as needed
- Includes 120V 10ft grounded power cord
- 2 3/8”H x 18.5"W x 46.25"L
- Includes 10' grounded power cord
Prices last updated on 2025-07-10 at 09:20
3. Must-have accessories for your grow light shelves
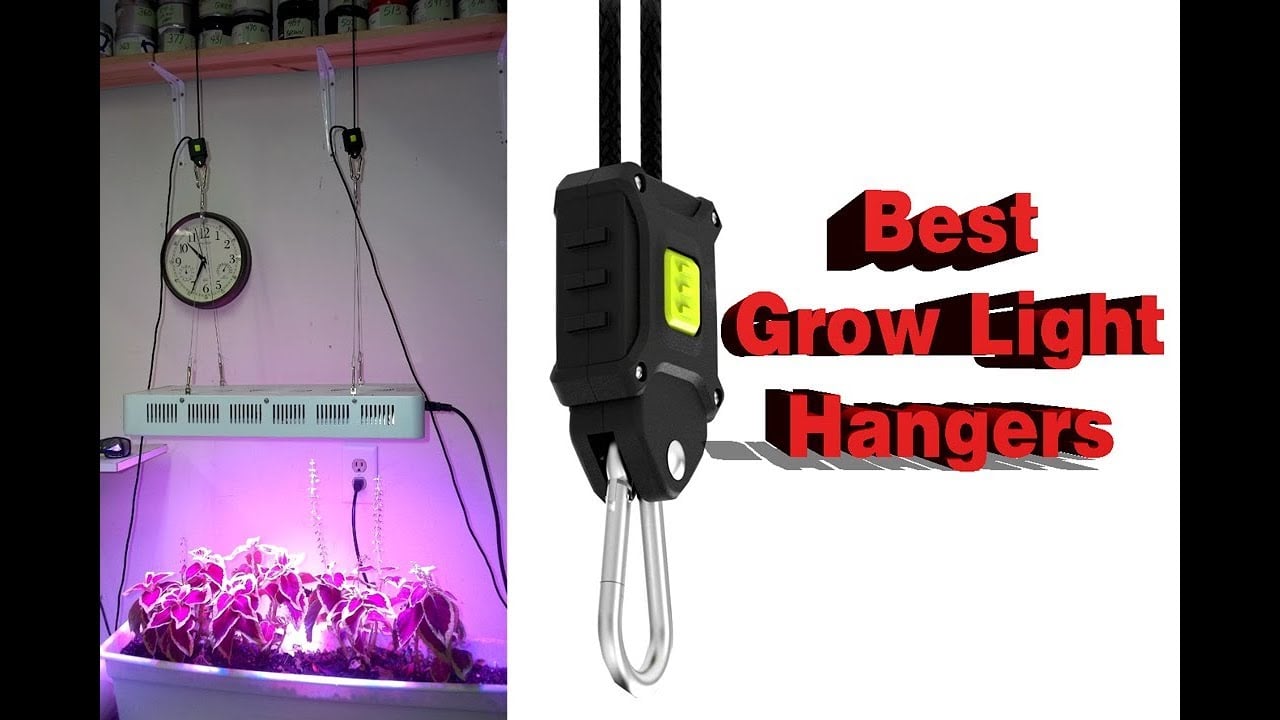
Accessory #1: Hang the lights with adjustable light hangers
An adjustable grow light stand is a must so you can move your lights up as your plants grow.
And you need a secure way to hang your lights on the grow shelf. The best tool for the job is ratchet hangers that are designed to suspend plant lights.
They’re easy to use and will support the weight of heavy lights.
The best hangers for your DIY seedling rack
A common alternative is to use chain and S hooks, but these can be finicky and require you to unhook the light to move the light up or down, which is just asking for trouble. You don’t want one slip of the finger to destroy all your hard work!
These ratchet hangers make raising and lowering the lights a pleasure rather than a chore.
You’ll need one pair per light fixture.
Prices last updated on 2025-07-10 at 09:20
Accessory #2: Set up an oscillating fan for each shelf
Besides growing your seedlings under lights, the other critical item that’ll ensure you grow healthy seedlings is an oscillating fan.
I can’t stress enough how important air movement is for seedling health!
An inexpensive oscillating fan pointed at each of your shelves will cut down on diseases like damping off and make your seedlings stockier and sturdier.
The type of fan you should use depends on your setup.
I have a second set of shelves across from my plants that I clamp my fans to and point directly at the plants.
You could also set a tabletop fan on a shelf unit that’s next to your grow light stand.
You may need to get creative if you don’t have anywhere to set a fan.
- One thing you could do would be to clamp a small fan on one side of each shelf and sacrifice some space for the fan.
- Another idea is to get a long tension rod that is long enough to go from floor to ceiling, and clamp clip-on fans to it.
You’ll need one fan per shelf.
Could you use a FREE set of plans so you can set up your seed starting rack in an afternoon? Click to download my seed starting rack plans right now.
Shop for fans
- The BEST INVEST AGAINST HOT SUMMER: The new and upgraded personal fan deliveries powerful airflow to make...
- STRONG CLAMP & HOOK FOR WIDE APPLICATION: What makes this fan unique is the base that doubles as a clip...
- VERSATILE AIR CIRCULATION: Tailor the airflow to your preference with this fan's two-speed operation....
- 360-DEGREE ROTATION: Experience versatile cooling with the 2-speed desk fan that offers a 360-degree...
- ADJUSTABLE SPEEDS SETTINGS: This Lasko white pedestal fan features 3 speed settings that allow you to...
- CUSTOMIZED COMFORT: The fan's height can be adjusted from 41" to 53.5", making it perfect for any room in...
Prices last updated on 2025-07-09 at 22:16
Accessory #3: Plug your lights and fans into a heavy-duty timer
Since your plants need some darkness each day, you’ll need to set your light(s) on a timer.
You’ll also want to put your fan(s) on a separate timer.
- ✓ VERSATILE & CUSTOMIZABLE: Easily set up to 8 on/off programs for the timer’s two grounded outlets....
- ✓ JUST SET & GO: Choose your own individual days or simply select one of the convenient pre-set...
Prices last updated on 2025-07-10 at 09:20
Accessory #4: Plug everything into a surge suppressor
You’ll also want to protect all of your seed-starting equipment from electrical surges.
A surge suppressor is a good insurance policy against losing all of your equipment because of some weird power spike.
- Protect Any Electronic Device From Power Surges & Spikes:Surge Protector with eight outlets and protects...
- PREMIUM SURGE PROTECTION WITH LONG POWER CORD: This surge suppressor provides eight total NEMA 5-15R...
Prices last updated on 2025-07-10 at 09:20
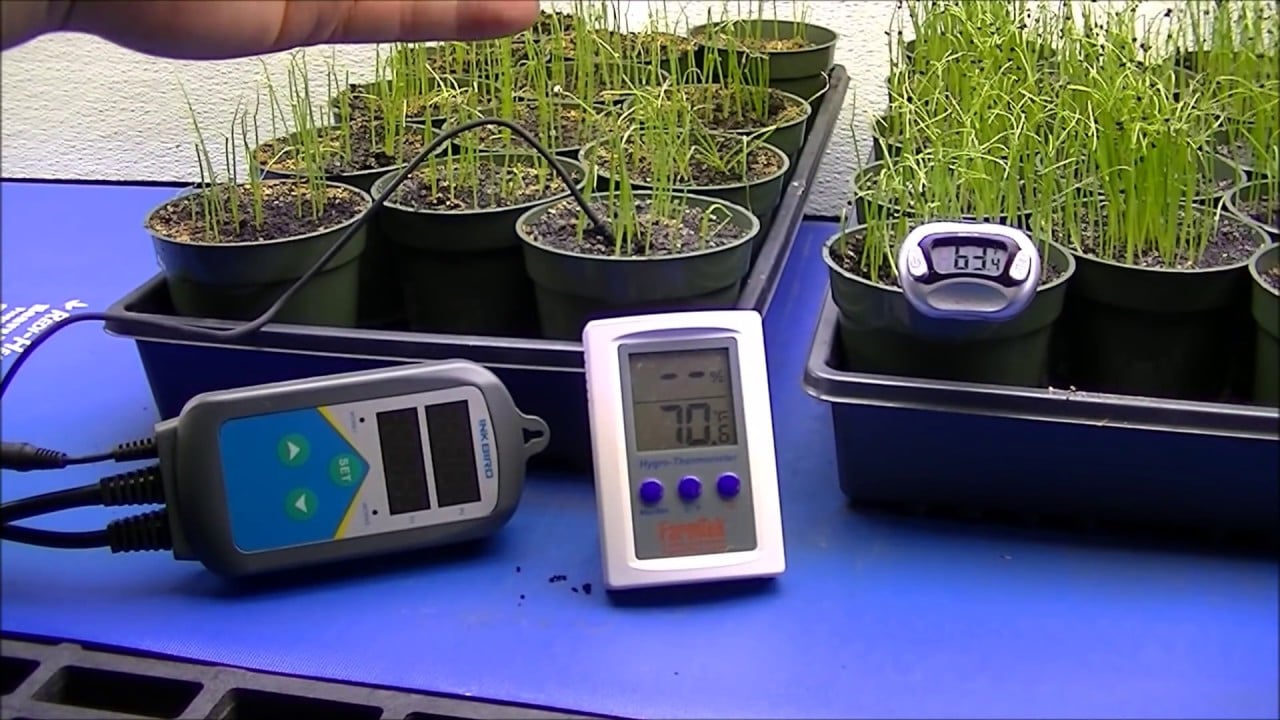
Accessory #5: Consider using a heat mat
A heat mat is optional but will help your seeds germinate faster.
- Unless you plan to start hundreds of plants at once, one heat mat should be enough.
- If you get a heat mat, I highly recommend getting a heat mat thermostat with it.
- It’ll turn your mat on and off automatically and keep your soil at a more even temperature.
- You can fit two 10″ x 20″ flats on one mat.
Shop for a heat mat & thermostats
- Reliable Results: The VIVOSUN professional heat mat maintains optimal temperatures around 68-86℉...
- Stable & Uniform Heat: The advanced far-infrared heating technology of this heat pad provides your plant...
- Professional, Reliable Results: Regulates and maintains your preferred temperature within a control range...
- High-Quality Construction: With an easy-to-grip hexagonal shape and made of an extra-fortified plastic,...
Prices last updated on 2025-07-10 at 09:15
Accessory #6: Use mylar to reflect light back onto your plants
If you plan to put your seed-starting rack next to a wall, covering the wall with mylar is a good idea.
- It’ll bounce light back onto your seedlings better than paint.
- It’ll protect your wall from water splashes and dirt.
- And, if you chose to go with the 1.5′ deep shelves, it’s helpful to bounce all the light you can back onto your plants since the 4-bulb fixtures that fit those shelves don’t provide full light coverage for your trays if you put 4 trays on a shelf.
- 2 Mil Thick (Heavy Duty not 1mil like many on Amazon)
- 48
Prices last updated on 2025-07-10 at 09:15
How to set up your seed starting shelves in 7 steps
Assembling your indoor seed starting setup should take about 2-3 hours.
- The only tools you’ll need are a knife to open up the boxes, a pair of scissors, and a rubber mallet to assemble the shelves.
- If you’re going to hang mylar behind the shelves, get some poster mounting putty or tape to attach it—use something that won’t damage your walls.
- You may also need some extension cords, depending on where your outlets are.
Got all your parts ready?
Let’s start assembling!

1. Decide where to put your seed starting rack.
The most common question I get is “should I put my seed starting shelves next to a window?”
- It’s not necessary to do that. You can, if you want, as long as your seedlings won’t be exposed to chilly temperatures overnight from the window.
- Keep in mind that you’ll be watering plants on this rack, and will inevitably get potting soil on the floor, and probably splash water onto any walls next to the rack.
- I recommend that you put your rack on a tile, concrete, or hardwood floor if possible, to make clean up easier.
2. Assemble the shelving unit and add the wheels (if using).
This is the part of the process that will take the most time.
Assembling the shelf unit isn’t difficult, but it’s easier if you have a helper and use a rubber mallet to tap the shelves into place.
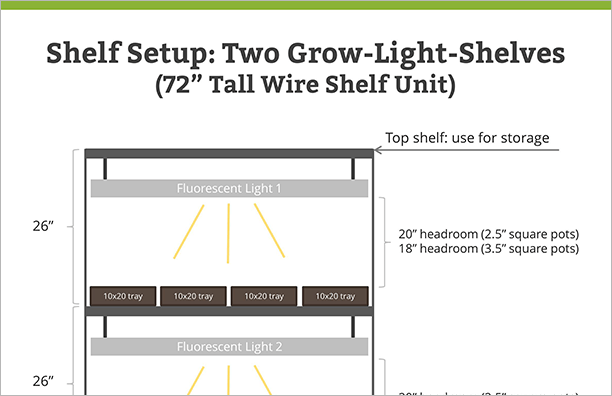
Decide how far apart to place the shelves.
- In my free set of seed starting rack plans, I outline different setups and show you how far apart to put your shelves depending on your situation.
- You can download the free set of seed starting rack plans here.
If you’ve chosen to put wheels on the shelving unit, do that now.
Depending on how you’ve decided to set up your shelf unit, you may end up with an extra shelf left over.
3. Hang mylar (if using).
If your seed starting shelf will sit next to a wall, I suggest covering the wall behind the shelf with mylar film.
It’ll bounce some light back onto your plants and protect the wall from scuffs and spills.
- Cut the mylar as tall and wide as your shelf unit.
- You may need to use two pieces and overlap them.
- Attach it with poster mounting putty or tape so you don’t damage your wall.
4. Securely hang your grow lights.
- Pull the light fixture(s) out of the packaging, set up the hangers and insert the fluorescent tubes.
- Plug each light into an outlet and turn it on to make sure it works and then unplug it.
- Attach the ratchet hangers to each shelf where you’ll hang a light. (You’ll need two hangers for each light fixture.)
- Set the first light fixture face-down, below the hangers.
- Let some slack out of the rope and tie the hangers to the light brackets.
- Test the ratchet hangers to make sure they’re working properly (raise and lower the light) and cut off any excess rope, if desired.
5. Set up the seedling heat mat (if using).
- Place your seedling heat mat on a shelf.
- Plug it into the thermostat.
- Plug the thermostat into an outlet to make sure it turns the heat mat on.
- Plug the thermostat into the surge suppressor and turn the thermostat off.
6. Add fans to your seed starting setup to provide much needed airflow.
- Assemble your fans, if necessary.
- If you’re using a floor to ceiling pole, set that up next.
- Position one fan per shelf where you’ll be growing seedlings.
- Test the fans to make sure they work and aim them at the shelves.
7. Plug the lights and fans into a timer and plug those into the surge suppressor.
- Plug the surge suppressor into the wall.
- Set the timer schedule for the lights. Your seedlings need 12-16 hours of light per day from the grow lights, so set your lights to stay on for at least 12 hours.
- Set the schedule for the fan(s).
- Depending on how strong your fans are, you’ll want them to come on for about 15-30 minutes per hour.
- This works to strengthen the seedlings, and get air flowing, but prevents the soil from drying out too much.
- Plug both timers into the surge suppressor.
Last step: celebrate, because you’re done setting up your seed starting system and ready to start growing!
How many grow lights do I need per shelf?
It depends on how many square feet of seedlings you plan to put on each shelf. Seedlings need 2,000 to 3,000 lumens per square foot. Make sure your grow lights are putting out enough lumens for your seedlings. The lights I recommend put out 8,000-20,000 lumens. So, if you follow my plans, your seedlings will get the light they need.
How do I hang grow lights?
I recommend using sturdy, adjustable light hangers to hang your lights for seedlings. Attach each hanger to the underside of a shelf or to your ceiling. Be sure to leave enough height between shelves for the hangers, lights, and seedlings when you plan how far apart to place your shelves.
How much light do seedlings need?
Seedlings need 12-16 hours of light per day. When they don’t get enough, they become leggy and weakened. When it comes to seedlings, taller isn’t better! The best way to prevent leggy seedlings and grow healthy, successful plants is to use grow lights when you start seeds indoors. That way, you can be sure they get enough light.
When do I put light on germinated seeds?
Some seeds need light to germinate. So, it’s best to place your seedling trays under lights right after you plant your seeds. But if your seeds have already germinated, and they’re not under lights yet, get them under lights ASAP so they don’t get leggy.
How far should seedlings be from grow lights?
It depends on what type of lights you’re using. If you’re growing under fluorescent lights, place the lights 2-3 inches above your plants. If you’re using an LED grow light, consult the instructions from the manufacturer. Many need to be placed 12 or more inches above the seedlings.
When do I remove seedlings from grow lights?
Remove your seedlings from their grow lights 1-2 weeks before you plan to plant them. They need to be hardened off (toughened up) before you plant them. And that usually takes 1-2 weeks.
Are fluorescent lights better than LEDs?
The main benefit of using fluorescents instead of LED grow lights is that you need fewer square feet of space for your seed starting racks. You can mount more fluorescent lights on one shelf unit. This means you can grow more seedlings in a smaller footprint. And depending on how many seedlings you want to grow, one shelf unit may be enough.
How do I grow seeds without a grow light?
To grow seeds without a grow light, you’ll need to start seeds outdoors. You can start seeds in a cold frame or try winter sowing if you don’t have grow lights.
Download your free DIY grow light plans
Make sure you have everything you need to set up your seed starting shelves so you can grow successful seedlings this year and every year!
Download my FREE indoor seed starting rack plans and supply list as a bonus for joining my newsletter.
Here’s a sneak peek of your plans:

You might also be interested in these seed starting articles:
- The difference between seeds and seedlings.
- The best seed starting supplies.
- Find the best seed companies online.
Your turn: tell me about your grow light setup…
Have you grown seedlings inside under lights? How did it go?
Do you have any questions about how to DIY a grow light for your seedlings?
Leave a comment below!


Good share Cheryl. Thanks for it. Can you please tell me how long should I keep my plants under grow lights?
What is an alternative to plastic seed trays?
Thanks for the great question! There are a few choices: Bamboo seed trays, wooden trays (these are best for outside use as they aren’t water tight), and old baking trays with a lip to catch water. If you’re worried about the plastic trays springing leaks or cracking, look for heavy-duty trays which are much more durable and less wasteful.